Pages - Menu

Saturday, February 8, 2014

Working on My Canning Skills

One of my biggest goals this year is to increase my canning skills and knowledge. I’ve made jam for years and began experimenting with simple recipes this year like adding fresh pineapple and making a strawberry pineapple jam. We also made applesauce this year from apples we picked off the trees on our property. The jams and the applesauce were done in a boiling water canner using regular metal lids, which is a pretty simple and straightforward process.

What I really want to get comfortable with is using a pressure canner and Tattler reusable canning lids. I received a great 23-quart Presto pressure canner for Christmas a year ago and have tried my hand at pressure canning a couple of times in the last year. One of those attempts was fresh corn we picked up at a local farmers market. From husking the corn to cutting it off the cob to filling jars and finally processing, we literally took the corn from the field to our pantry. The corn we got was a bi-color sweet variety and in the canning process it started to brown some. The flavor is still pretty good, though it does taste slightly overcooked, so I’m guessing the browning is due to the high sugar content of the corn itself.

There are several things I’d like to try to can, but at the top of my list has been canning beans. I am absolutely horrible about remembering to soak beans the night before I’d like to cook them and we like to eat beans in a multitude of dishes. I’ve read that beans are one of the easiest things to can and since CT and I both really like black beans, I figured they would be the best ones to try out.

The night before I was planning to can, I prepared about 3 pounds of black beans. I sorted through the beans to remove small stones and broken beans and then covered them in about 3 inches of water. They would need to soak for at least 12-14 hours to I started them soaking about 6pm knowing I would start the canning process shortly after breakfast the next morning.

The next morning I began my foray into canning beans by first collecting all of my supplies – pressure canner, racks (for stacking jars), funnel (for filling jars), jar lifter (for removing from canner), bubble remover, Tattler lids and rubber rings, and metal rings. The beans had soaked up most of the water from the night before and were ready to be drained and rinsed.

DSCN0279

After rinsing the beans, they had to be cooked for about an hour prior to processing in the canner. I like adding seasoned beans to different dishes so I added some multi-purpose seasoning to the beans as they cooked. I used about 1 teaspoon per pound of beans. I brought the beans to boiling then lowered the temperature to a simmer for about an hour. \

DSCN0280

To make canning a process that truly saves me money, I felt it was important to not only reuse jars, but to also reuse canning lids. The metal ones that come with the jars are meant for single use only and I don’t want to have to buy more lids every time I use up a metal one. I’ve read many good things about Tattler reusable canning lids that I decided to pick some up for use in my canning adventures. So while the beans were cooking, I started to prepare the lids and rings by sterilizing them in scalding water.

DSCN0281

Once the beans were ready, I began filling the jars. I first added the beans leaving 1” headspace then added water the beans had cooked in and finally removed air bubbles by running a plastic utensil around the inside of the jar.

DSCN0282

After I had all of the jars filled, I cleaned the rims with a wet cloth while checking for nicks and chips. I then placed a rubber gasket and lid on each jar and secured them with a metal ring. When canning with Tattler lids, this is one part of the canning process where the directions are slightly different than with metal lids. When canning with metal lids, the ring should be screwed down to finger tip tightness. When canning with Tattler lids, the ring is screwed down just to the point where resistance is met.

DSCN0283

The jars were now ready to be added to the canner! While the beans were cooking I prepared the canner by heating about 3 quarts of water. (Unlike a water bath canner, jars in a pressure canner do not need to be covered with water.) By the time I was ready to add the jars, the water was simmering. I managed to fill a total of 10 jars of beans so I needed a rack for the bottom of the canner along with one to stack a second layer of jars.

DSCN0284

With all of the jars in the canner, I locked the lid in place and watched for steam to start escaping from the vent. Once the steam was flowing, I waited for 10 minutes and then placed the weight over the vent. This allowed the pressure to begin building up in the canner. I watched as the pressure gradually rose and adjusted the heat on the stove so that once I reached 12lbs of pressure (we’re at about 2800’ elevation) I would be able to maintain that pressure for an hour and 15 minutes.

DSCN0285

After the necessary time had passed, I turned the heat off on the stove and waited. I have read that the canner should be removed from the heat but due to its weight, the glass cooktop, and the room I had to maneuver, I simply let it sit where it was while the pressure went down. It is very important during this part of the process to allow the cooling to happen on its own. You NEVER want to remove the lid to the pressure canner until the pressure has completely gone down. The canner is ready to be opened when the pressure gauge reads zero and the stopper in front has dropped down. With the pressure down, I opened the canner and removed the jars. This is another point when canning with Tattler lids differs slightly from using metal lids. Since the rings were not tightened completely before processing, they are now screwed down to finger tip tightness, which only amounted to about an inch worth of turning.

DSCN0286

I allowed the jars to sit for 24 hours before removing the rings. I checked to make sure each jar had sealed by lifting the jars by the lid and I had 100% success! This is only the second time I’ve used the Tattler lids. I am thrilled that all of the jars sealed. Now I’m looking forward to trying the beans and to canning more very soon!

DSCN0287

Monday, January 27, 2014

Adding to the Family

Our first goal in moving to a homestead was to get chickens and I am proud to say that we have met that goal! One of our Christmas gifts was a chicken coop (with much guffawing from the giver) so we had a home for them. We had been debating back and forth about whether to get the hens now or wait until the spring until a neighbor came to us and said he had a friend who was giving away a flock of Rhode Island Reds and asked if we would like any. Knowing that we wanted chickens no matter when we got them we told him yes. So we headed down to a great local co-op where we purchased a feeder and waterer along with some feed and pine shavings. A couple days later the neighbor said his friend had already given away the chickens. So what were we going to do with all of these supplies? Well, we took to Craigslist where we found a local seller with a great reputation and off we went to get our chickens! We ended up getting 2 Marans that are already laying and 2 Rhode Island Reds, one that should start laying in about a month and the other in about 3 months.

DSCN0252  DSCN0251  DSCN0253

DSCN0255  DSCN0263

The first confession I have to make when it comes to chicken raising is that it’s been nearly 3 weeks since I first began this post. A great deal has happened since we first brought the girls home and that leads to my second confession. We lost one of our beautiful new girls. Sad smile The large Rhode Island Red in the first picture was lost to a predator six days after we brought her home. We were allowing the girls to range outside the coop in the fenced area, but the fenced area is not covered. We weren’t watching the girls when they were outside the coop, but we weren’t really thinking about possible predators either. I was just pulling in from school when CT met me at the car and told me we’d lost one of the chickens. We’re not 100% certain what happened, so we’ve tried to piece together a possibility from the evidence we found. CT had checked on the chickens about an hour and a half before I got home and they were fine then. Right before I got home, he heard our neighbors dogs barking madly in the vicinity of the coop. When he went up to the dogs to shoo them away, he found the chicken with most of her innards ripped out. We tried to find signs that the dogs had pulled her out but there were no holes or other gaps around the fencing of the run; however, there was a big pile of feathers outside the fencing near a corner of the coop. Our best guess is that a hawk tried to pick her up but found her to be more than she could handle and dropped her right outside the coop at which time the dogs found her. Whether it was the hawk or the dogs that killed her is unknown, but there is definitely a Cooper’s hawk hanging out in the trees around our place. Needless to say, the three remaining girls were immediately put back into the enclosed run area.

Our next learning experience with the girls has been the extreme cold weather we’ve been having. The weather was great for the first week and a half we had them here, then things turned really nasty. With heavy snow and subzero wind chills, we were very worried for the girls in their small coop. Since the coop is right next to the garage and it is fairly light and mobile, we decided to move them inside the garage (in the middle of a massive snow storm). It’s not a heated garage, but it is insulated and would provide shelter from the winds. We filled the bottom of the run with newspaper and pine shavings and so far they’ve been doing very well. We’re supposed to see a warm up by the end of the week so we’re hoping to get them moved back outside in a few days. I know they would probably appreciate being able to scratch the ground rather than cement.

The Marans have not begun laying since they were moved and with the stress of the weather and the coop being moved around, we expect it’s going to take a bit more time for them to begin laying again. The young Rhode Island Red (who I named Scarlet) is really showing a lot of personality. Whenever either CT or I go in with scratch, she has to first get her pick from the cup we have it in before we toss it into the run. And she’s teaching the Marans (who CT named Phoebe and Zoe) to do that too. Scarlet loves to be picked up and will gently pick at whatever treat I happen to be holding for her. The Marans are still apprehensive about being picked up, but they’re getting more and more comfortable with us.

Looking forward, we are making plans to build a large covered run so the girls have plenty of room to scratch to their heart’s content. We are also planning to expand the coop so that we can bring our total number of chickens up around 12-15. We’re going to order chicks to arrive sometime in the spring so that we can experience raising them from babies. We’ll also likely add a rooster so that next year we may try our hand at raising chickens from egg to adult. There is so much to learn and so many beautiful breeds that we’re certain we’ve only scratched the surface. Even with the loss of a chicken, we are truly enjoying the girls and look forward to when we can start making scrambled eggs using fresh eggs.

Until my next confessional, happy homesteading everyone!

Saturday, January 11, 2014

Some Thoughts in a New Year

Another holiday season has come and gone and 2013 has drawn to a close. It’s almost 2 weeks into the new year so I suppose it’s high time I offered up some thoughts about where we’ve come from and where we’re heading. This past holiday season was an interesting one for CT and me and one that caused a lot of personal reflection. It could be because we’re getting older or maybe it’s just our move to the country, but we really began to see just how much the excess in our country has gotten out of hand. We’ve always realized it and it was a big part of our decision to move, but as we traveled to the Northern Virginia area to spend the holidays with family, it became even more apparent. Nevermind the sheer number of people in the area, forget the over-sized houses stacked almost on top of each other, it was the smaller, wasteful things that really got to me. The home that had lights on in the living area 24/7, yet not a single soul was ever seen in the room. The plethora of cars on the road with only one person in the car and traffic headaches to make even the most patient person contemplate road rage. It just felt like the excess was bombarding us from every angle. Now granted, Washington DC and the surrounding suburbs are most definitely the epitome of wastefulness in America (in more ways than one), but this year it seemed to be worse than ever.

If there’s been one thing we’ve learned in the last few months is that there are actually very few things we actually “need” to be comfortable and happy in life. Food and water are obviously given requirements. Depending on your location, water could potentially be free. Food can get pricey, but those costs can be lowered if you grow some of your own and shop smartly. Shelter is also a necessity but how much shelter does a person actually “need”? Our old house was a bit over 1600+ square feet and now we’re in about 1200 square feet and still have space we don’t use. So does one person, or even a couple, “need” to live in a 2500+ square foot house? Transportation in some form is a necessity for most people, but do two people “need” to have more than one or two cars? When one takes the time to evaluate priorities and decide what is necessary in life, it is easy to find many things that we think are necessities are actually luxuries. As we continue to whittle down the luxuries in our life to find the true necessities it becomes even more noticeable that our society has become brainwashed into believing that luxuries are actually necessities. We have less now that we did in our old home and I earn less teaching at this school than I did at my last, but overall we are happier and more comfortable than we have been in many years.

Like I said, maybe it’s just us getting older but when we left the area for our drive home, we couldn’t get out of the city quick enough and back to the peace and quiet of our mountain home. Although we still have a ways to go in weeding out all the luxuries we once thought were necessities, we are well on our way and we couldn’t be happier.

Sunday, November 3, 2013

Starting Our New Life

The drive to our new little cabin in the mountains went very smooth and without incident. I know CT would probably say otherwise since he was driving the U-Haul with our car in tow and the climb from the Piedmont area into the mountains was anything but easy (not to mention the narrow country road that brought us to the house). I drove our SUV, which was pretty well packed to the gills with odds and ends along with our three dogs.  However, once we arrived and sat down to rest on a large porch that overlooks the valley, we knew we were home. We took our time getting the U-Haul unloaded since we had 3 days before it had to be returned. We were also exhausted from the stress that comes from moving and just needed to take it slow. Once the U-Haul was empty and returned though, we were able to breathe a HUGE sigh of relief. Now we could really take our time. Aside from me getting things ready to move to my new classroom, we had no time constraints on getting settled and we took that quite literally.

We’ve been here three months now and we’re finally feeling settled. Although there are still some unpacked boxes, they don’t contain any essential things so we’re not in any hurry to get them unpacked. Our goals now have to do with setting up the homestead. There are a lot of things we’d really like to do, but we’re also smart enough to know that we have a lot of learning to do first and that we should be careful to not bite off more than we can chew. On our list of things to do:

  • Set up a chicken coop
  • Start a rabbit hutch
  • Prepare land for a garden
  • Set up hydroponics for lettuce and herbs (This is CT’s goal, but I’d like to add aquaponics to that mix)
  • Install higher wattage solar panels
  • Build up our stores of home-canned goods

I know, there is a lot of ambition in that list, but I think it’s manageable. There are other things we could add, but these are what we’d like to do in the next year or so. Since we’re renting our house, there are some things we want to do but will need to wait on such as planting some particular fruit trees or raising goats. We do have access to multiple apple, pear, cherry, and plum trees on this property so that’ll help. We have taken advantage of the apples and pears this year to make several pints of applesauce and dehydrated cinnamon apple and pear chips. Our landlords have given the go ahead on the chicken coop and garden and will even help us get the land ready for planting. Our plan is to stay in the house for about 2 years while we look for and then prepare the land for our own homestead. In the meantime, we’ll use this place as a learning homestead, although I am fully aware that learning never ends on a homestead.

The more I learn about my family, the more I realize that this need or desire to live a self-sufficient lifestyle is not just a personal desire, it’s really in my genes. I have family that live on homesteads now and many more that have in the past. I have close family that are also trying to lead a more self-sufficient lifestyle. I have ancestors that traveled across the country using a tiny house on wheels long before “tiny homes” became trendy. As a child, I remember picking beans from my grandparents garden then sitting in the kitchen with my cousins preparing those beans for dinner. I recall my mom making dill pickles with some of the jars having jalapenos in them and then trying those pickles and thinking my tongue would fall off, but the regular dill ones were far superior than anything we got in the store. I grew up learning the importance of self-sufficiency, but as I made it to adulthood I seemed to have forgotten those lessons. It’s taken me 20 years to realize the wisdom in life lessons I learned as a child. I’m so glad that I’m finally doing something with those lessons, I just wish I had done something sooner.

Saturday, September 28, 2013

Adventure Awaits (part 3)!

Job? Check! Rental house? Check! Packed house? Not quite!

Next up was making the actual move. Due to the date I set for my resignation, I would be working up until the week before the move. That meant almost all the packing was going to have to be done in the evenings and on the weekend.  At least I work in a place where there are A LOT of boxes to be had. I asked our wonderful cafeteria and maintenance staff to please save boxes for me. Since I’m a teacher, it meant I not only had to pack our house for the move, but I also had to pack all of my classroom resources, which, as a science teacher, was a significant amount of “stuff”. Oh, and in the meantime, I still had to finish out one school year and plan for the first few weeks of a new year. Even with great resources, that’s still a necessary time commitment.

One thing I quickly realized as I began to pack was that we had accumulated A LOT of “stuff” in the six years we’d been in our house. Not to mention, I found a couple boxes that hadn’t been unpacked since we had moved in! Holy cow! I knew that multiple trips to the thrift store and county dump were going to be in our future. The hard part would be deciding what would stay and what would go. The thing about most “stuff” in our lives is that it got there because we wanted it. There is some kind of significant meaning behind most of it and letting go can be a difficult thing. Take, for instance, a collection of state quarters. When the quarters were first introduced we bought a nifty display card that had a slot for each of the fifty quarters. We checked our quarters diligently for several years to make sure we had one of each state and then carefully pressed it into the slot for the world to see. But, the thing is, many of the quarters had been circulated already so they weren’t all shiny and ultimately weren’t worth more than their face value and a bit of sentimental value. So now we are $12.50 richer and honestly don’t miss that collection. Granted that example may not seem like something hugely sentimental, and to be honest, it’s not, but the point is that there are a great many things in our lives that are just like it and sometimes we just have to learn to let go.

So bit by bit the “things” that defined our lives were slowly disappearing into boxes designed frozen pizzas or fresh fruit and those boxes piled up in the garage. I tried to pack a few boxes each evening and even more on the weekend. Each day the pile in the garage grew until we couldn’t park in the garage any longer. As the day for the move got closer and closer, the packing got more and more frantic. I had been careful about how I packed (that’s the old Army brat in me) – keeping like items together in a box, accurately labeling boxes, fitting as much as possible in a box before closing – but as time got shorter, I really had to fight with that OCD part of myself. I knew I’d probably regret it once we got to the new place, but I just didn’t have the time any more to be picky. Kitchen items were packed with computer room odds and ends. Some of my craft items ended up in boxes with linens and Christmas decorations were mixed with Halloween (is that even legal??). I still tried to label things so hopefully I wouldn’t be too confused when the time came to unpack.

In the end, everything came together and we were about 90% prepared on the actual day of the move. We hired movers to help us load the U-Haul truck and after several back breaking hours we had most of our belongings tightly packed into the truck. We were ready to hit the road. There were a few things left in the house and we still had to do a deep clean so we made plans to go back to the house a week or so later to finish up. We rose early the next morning, walked the dogs, had breakfast and a cup of coffee, then loaded the dogs and a few random odds and ends. We were on our way to a new country life before the sun was even up. Leaving our home of six years was bittersweet, but we knew we had an exciting adventure waiting for us on the other side of the state. The next step… unpacking.

Thursday, July 25, 2013

Adventure Awaits (part 2)!

Now that I had a job in the mountains, the hard part would begin. Leaving my current position, packing, finding a place to live, moving, and finally starting a new job. My head was spinning so fast once I was offered the job that I wasn’t entirely sure where to start. I spoke with my principal to tell her that I would definitely be leaving shortly after the start of the school year (I work in a year-round school) and then submitted my resignation. I began breaking the news to my co-workers, who were all completely shocked. I know it came out of the blue for many of them. The funny thing though was that as I started to tell more people, everyone began telling me how jealous they were of this opportunity. So that makes me think… why don’t more people take that leap of faith to do something they really want to do? I guess sometimes it’s just easier to stay put than to make a major life change. When you only live once, I really think it’s important to make the absolute most of that chance.

However, what’s a job in a faraway place worth without a place to live in? It was time for some serious research. We decided we didn’t want to buy a house right away and would find a place to rent instead. We really want to get to know the area well before we commit to a mortgage in an area we don’t like. If we’d done that when we first moved to our particular area, we would have been incredibly miserable. For now, I had to begin looking for rental properties.

I headed straight to Craigslist to see what could possibly be available. While there were many listings for the area, it was much harder to find a place that would accept pets, let alone a German Shepherd. After watching the ads diligently every day, I finally found four possibilities and lined up appointments to see the houses. It was time for a ROAD TRIP!

We loaded Gabby up in the Expedition early on a Saturday morning for a one day 10 hour round trip adventure. Our first appointment was for 11am and we had 3 more in 1 hour increments after it. The first stop was a 2 bedroom/2 bath cabin with detached garage on 2 acres of land located off a dirt road. We talked extensively with the owners then took a look at the home and immediately fell in love. No matter what else we saw that day, nothing would compare. This home was *exactly* what we were looking for. However, the owners said they were showing the home to one other person who had contacted them before us and they felt they needed to offer them the home first if they were interested. I told her I understood and we would just wait for her to let us know.

We were then off to our second appointment. This house was not nearly as nice and had an unusual driveway. It must have had an angle of probably 50 degrees or more. And although it was listed as having an acre of land, the house was situated on one corner with another house about 10 feet behind it. Definitely NOT what we wanted. We politely declined and headed to the next home where we arrived about 20 minutes early. The home was set back a few feet from a busy street and as we waited to speak with the owner (who was in the middle of showing the house to someone else), we must have counted at least 5 cars go racing by. Again, not exactly our cup of tea, which was fine because the owner finally came out and told us the people before us were going to take it.

Off we went to the last home. It was a very small 2 bedroom/2 bath home on the side of a mountain with a lot the size of a dime and absolutely no room for Gabby. Not to mention, the road getting into the home was so narrow that our Expedition was almost too wide. How in the world would we get a U-Haul up to the house? Again, we politely declined and then hit the road for home. Out of 4 possibilities, only one was what we were looking for and unfortunately, that wasn’t a sure thing. All we could do was wait, and starting looking for more homes.

I few days later, I got a call from the owner of the first house. She wanted to offer us the house! Imagine our relief and excitement. We couldn’t have asked for a better home. I’ll have to drive about 25 minutes each way to work, but the view from the front porch is amazing and we’ll be able to have a HUGE garden along with chickens. The location makes the commute worth it so I definitely won’t complain. Not to mention we’ll be in the middle of a national forest, 10 miles from the Appalachian Trail, and about 30 minutes from a major national park. What could possibly be better for someone who loves the outdoors? Everything was falling into place for our move to the country. Now on to the hard part…. packing.

Sunday, June 30, 2013

Adventure Awaits (Part 1)!

When I started this blog over a year ago, the idea was for me to have a place where I could chronicle my family’s adventures in learning how to homestead. Our goal for several years has been to find a place in the country where we could have some land and work toward a self-sufficient lifestyle. We both love the mountains and knew that was where we wanted to be. In the meantime, we would learn what we could on a quarter acre in suburbia.

A couple of months ago, CT came to me and said that we need to do *something*. We needed to figure out a way to make this move to the country a reality. He's not happy with his job and I’m feeling serious burnout after only 3 years of teaching (but that’s a discussion for another day). We both acknowledged that it was time to pull ourselves out of the rat race before we got dragged further in. We decided we would try to make the move by the end of this year. I wasn’t too keen on possibly moving to the mountains in the dead of winter, nor leaving my students in the middle of a school year. I felt it would be better to wait one more year and make the move next summer. CT reminded me that if we kept making excuses about moving that it would simply never happen. There’s always going to be a tomorrow, but we need to live for today. I think my next response shocked him. I told him we would have to move this summer then. It’s easier to find a job as a teacher when I can start at the beginning of a school year and it’s easier as a teacher to work with students from the beginning of the school year. If we were going to do this it was time to jump into the deep end.

I began researching counties in the western part of the state and started looking into open teaching positions in those counties. I quickly found one position that I was very interested in (middle school science) and another I was only semi-interested in (middle school math AND science) so I promptly sent off my resume to both positions and continued to look. I was contacted for a phone interview at both positions within a couple of days. The interview for the science only position would happen a week prior to the math and science position. The interview happened on a Friday and went exceptionally well. They requested my references including my principal’s contact information which meant I had to break the news to my principal that I might be leaving. Although my principal was upset to hear the news, she also understood our need to get to the mountains. She was very supportive and wished me luck in obtaining the position. I have no idea what she told the principal from the new school, but by the following Monday I had a new job. I could hardly believe it!

The first part of our plan to move was in place. Now we had to find a place to live! That was going to be a little more difficult. We currently live about 5 hours away from where I got the job so it wasn’t like we could just drive over and look at houses. Not to mention, we have dogs and that can put a damper on finding a rental. In any case, I’ll write more about our search for a place to live in the part 2!

Sunday, June 2, 2013

New Neighbors

For Christmas last year, my dad sent us a beautiful heart-shaped wreath made of natural ingredients like eucalyptus, dried flowers, and sticks. The colors are red, white, and blue so it’s useful year round. I’ve had it on the front door since Christmas and I absolutely love it! Some of the flower colors have faded a little, but it still looks beautiful.

Well, a few weeks ago I noticed some new sticks right in the corner of the heart. Although they were really more like small twigs. It appeared that a bird had found a place for its nest! No big deal, I thought. We don’t actually use our front door a lot since it’s right next to the garage and we typically go out through the garage. So I watched the nest steadily grow over the next few days and listened to the birds happily chirping right outside the door. Then one day I noticed that the nest looked complete so my curious self decided to take a closer look. Much to my surprise, I found a light blue speckled egg inside!

IMG_0599IMG_0600

I then watched the nest closely for the next few days. Mama bird sat in her nest chirping away and papa bird (presumably) sat on the corner of the house watching over her. Day after day they were there, chirping back and forth to each other and each day, there was a new egg until we got to a final total of 5. (I missed getting a picture of the day there were 3 since I was gone most of the day).

Papa Bird Watching OverIMG_0612IMG_0613IMG_0615

After looking all over the Internet and in a book of local birds, I’ve decided the birds are house finches. The last egg appeared a bit over a week ago and according to the Cornell Lab of Ornithology, they have an incubation period of 13 to 14 days and a nesting period of 12-19 days. My best guess is that the first egg was laid about 2 weeks ago. If that’s true then we should start seeing babies in the next few days. We’ve been careful to not approach the nest unless the mother is already gone and especially careful not to touch anything. The nest is high enough up on the door that only other birds would be able to reach it. I really hope that I’ll be able to get pictures of the birds, but I don’t want to scare mama bird away from the nest so I’ll have to be careful. In the meantime, we just enjoy listening to the birds in the morning and we’ll just have to wait and see what happens!

Friday, May 31, 2013

Perpetual Learning Curve

I’ve learned a large number of things over the last few months since I last posted. Among the most important:

  • The goal of writing a blog post at least once a week was WAY too ambitious. And knowing my procrastinating self, I should have never made that goal in the first place.
  • Gardening is both a frustrating and rewarding endeavor, and takes A LOT of work, which can be difficult for someone who works full-time and is working on a Master’s degree in her spare time.
  • Pressure canning is a tricky process and one in which you can never ever cut any corners.
  • As much as I would love to raise chickens, the rural (yes, I said rural) town in which I live does not at this time allow backyard hens. Maybe it’s time I learned how to change that.
  • There is no possible way in the world that I will ever be as elegant and astute as all of the amazing bloggers that I currently read; however, I can just be me and give my perspective on this new way of life I’m moving toward.

As I mentioned above, I lead a very busy life. I teach 8th grade at a local middle school. I am also the advisor for the drama club. Yes, I know, I’m crazy. You don’t have to tell me that! But the fact is, I really do love working with young adolescents. As frustrating as they can be, they are at a stage in life where they can be truly teachable and it is possible to make a difference. In addition, I am working toward a Masters degree that will give me the certifications I need to teach high school. As much as I love middle school, I’ve found that I’d like to teach more advanced subject matter and be able to take it to a greater depth, which is simply not possible in my current position.

So now that it’s been over a year since I last wrote, and now that I have more visitors due to my Pinterest board, I think it’s about time I tried to give a little more attention to my story. I have an amazing garden this year that I will write about very soon. I have done more canning and have been trying new recipes. I’m working on better menu planning and food budgeting. There is plenty to catch up on and I will attempt to do so in the next few weeks.

Thanks for stopping by and I hope that some of you will join me in my learning adventures!

Wednesday, June 20, 2012

Learning Curve

Gardening is not a task for someone afraid of learning. You can't simply put plants in the ground and say "Good Luck!". Plants need help along the way and figuring out just how to help them is where the learning part comes in. It's not like plants can come along and say "Hey, I need some nitrogen here!" or "A little more water please". But, they do have ways of alerting you to a problem. My cucumbers are doing just that. I know I don't have the best soil and I also know that I haven't done a whole lot to really improve the soil aside from adding some gardening mix. What I don't know is exactly how to improve the soil for what I'm growing with little to no expense. Granted, I've read a lot of different things that would probably solve my problems, but they all require shelling out a chunk of cash that I just don't have right now.

So back to the cucumbers. Until last week they were looking great. Big green leaves, lots of cukes starting to grow, sturdy vines crawling across the ground. Then we got a couple of days of almost non-stop rain. I thought, "Great! My ground was really needing a good soaking!" Within a day or so though, I noticed all the cucumber leaves, especially those closest to the root, starting to turn splotchy yellow and then very quickly to brown. What in the world?? I thought they needed the water? My first thought was that maybe the hard rain was bruising the leaves, but that didn't make sense. Plant cells have rigid cell walls that are specifically there as a barrier to the elements. Then it was that maybe they just got too much water. But as the yellowing seemed to get worse and spread further down the vine I figured it was neither of those problems. I checked the plants thoroughly for bugs but couldn't find any in the leaves or on the stems that might be causing a problem. Off to the Internet I go to find out what's wrong.

The best thing I can find is that there is a lack of nitrogen in the soil. Our soil here has a fair amount of clay and, like I said, I didn't do a whole lot to supplement it. I did till in a topsoil mix when I was preparing the plot and I planted each seedling with garden soil. I also got a plant food for vegetables that I added in with the initial planting. Everything looked so good for quite awhile! UGH!! I guess for now I'll try a plant food with a higher percentage of nitrogen and clip out the leaves that are dead or dying so they aren't trying to pull in any resources. I still have several very nice cucumbers growing, so the plants aren't completely dead. I'll just keep my fingers crossed and hope they can pull through this. If not, well, lesson learned for next year and I'm really going to miss my fresh cucumber and tomato sandwiches.

Sunday, June 17, 2012

Picking Blueberries

One of the things I love about summer in this part of the country is the plethora of fresh berries. Strawberries in May transition to blueberries and blackberries in June and July. There are several pick your own strawberry farms around and of course I have my favorite, but the strawberry season is over now. Blueberry farms are little more scarce; however, there is one down the road from where we live that never ceases to produce the most wonderful berries. Due to the unseasonably warm temperatures this past winter, the berries are in a week or so early, which meant it was time to head to the farm!

Saturday morning, temperatures in the 70s, clear blue skies - a perfect day for berry picking. Hubby and I headed down to the farm with our buckets in hand. As we were walking out to the bushes, we passed several people with overflowing buckets. One couple mentioned it was so easy! We couldn't wait to start picking!

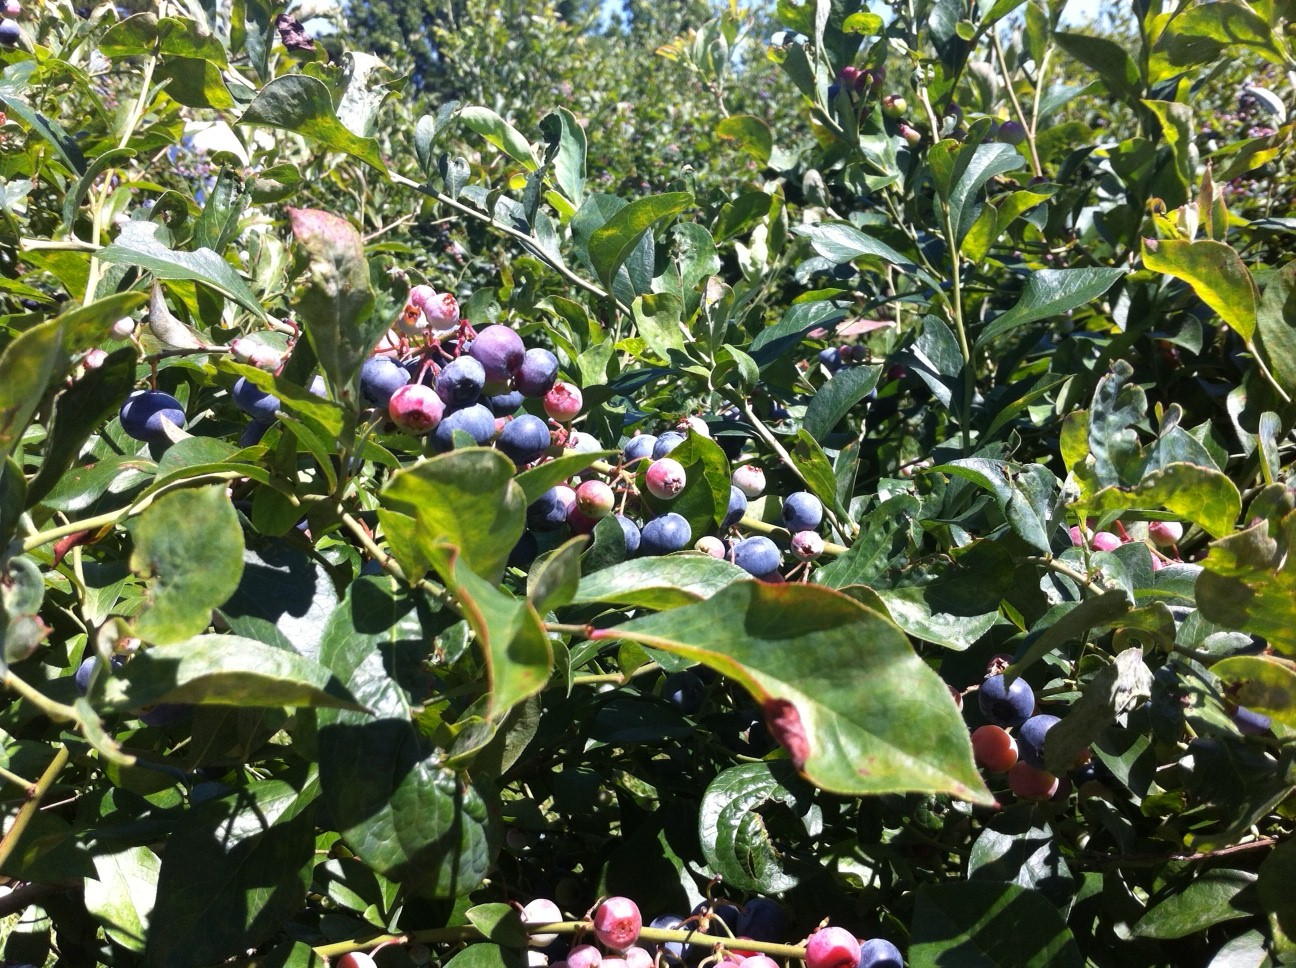
The bushes on the ends of the rows were fairly picked over, but there were lots of green berries which meant there would be lots more to come this year. We chose a row and headed about halfway down before starting to poke through the bushes. What we saw were some of the biggest and most beautiful blueberries! We barely had to touch them and they fell off in our hands. Huge clumps of 8-10 berries at a time, some the size of a quarter! We couldn't help but try a few while we worked. We had to make sure they were ok for eating right?? I couldn't believe how sweet and juicy the berries were! These are definitely going to make for some great recipes.

Can you believe how many berries there are??

Perfect berries!
One full bucket!


It didn't take us long to fill two buckets with berries. Then it was off to weigh the berries and pay for them ($3.00/lb). In all we had about 11 pounds of berries. Not a bad haul for about 30 minutes of work! I'm really not too concerned about their price since there is no way I'm going to find berries like these in the grocery store. Not to mention that spending a morning picking berries with my best friend is one of the best dates in the world so it was well worth the cost.

Now I've got to get these all processed! I'm planning to do some freezing and some drying with this batch. I'll definitely keep some fresh for the next week or so (until we go again next weekend most likely) to have for breakfast with oatmeal and I might just try my hand at a homemade cobbler. I'm tempted to try making jam, but I've never made or had blueberry jam so I'm a little hesitant. In any case, these are a great batch of berries so I'm sure that whatever I decide to do with them, it'll be fantastic!


Friday, June 1, 2012

How Does Your Garden Grow?

I confess! I am a complete and utter newbie when it comes to gardening. I grew up as an Army brat so we were constantly on the move. I didn't live in the same place for longer than a year until I was in high school. I do, however, remember my grandparents having a beautiful garden. I can remember going there to pick corn and peas and green beans and helping my grandmother prepare them for dinner or for canning. It was an important part of their life and they helped me understand at a very young age just how important having a garden is. My problem is that I have a tendency to kill house plants, but I really want to have some fresh veggies that I grew myself.

With that being said, I decided this would be the year that I really dig in my heels and give gardening the old college try. I'm fortunate in that my backyard has full sun for most of the day and I have a nice flat area to use. I'm not so fortunate in that I live in the South and have a backyard full of red clay dirt. No matter what though, I was going to give this a try. Here's the play-by-play so far:

In early March I decided I would try starting seeds indoors. I mean, how hard could it be, really? You buy the starter kits, wet down the little peat moss pods, poke the seeds in, and wait. Well, apparently it's not as I thought because even though my seeds sprouted, they weren't getting solid stems and then I wasn't being so good at hardening them off outside. (That's going to take some learning!) My next decision was to get the land ready and pick up some seedlings at a nearby farmers market.

April 7 - I enlisted the help of a friend with her tiller to get the ground set for planting. It's a not a particularly huge plot so it didn't take too long to get the ground broken - turning in the topsoil however, is another story! But the final product looks good enough to start planting!

Garden Plot (w/Gabby)

Garden Plot 2 (w/Gabby)
April 29 - The next step was to get some plants so off we went to the farmers market. I picked up tomatoes, zucchini, yellow squash, cucumbers, peppers, jalapenos, and a few different herbs. I also planted some onion seeds and put in a row of marigolds because I've read they're supposed to help with bugs. Then off I went to a nearby garden center for some garden soil and started digging holes. Everything is looking good so far! (For fear of any possible cross pollination, I planted the jalapenos in a pot on the porch so they aren't in the pictures. I'd hate to have jalapeno flavored tomatoes!)

First Plants

Herbs - Greek Basil, Oregano, Dill, Cilantro, and Dark Opal Basil

Onion seeds

Tomatoes - heirloom beefsteak, 2 types of cherry, and roma
May 7 - Now the fun part. Watching the garden grown. Pulling weeds. Watching the garden grow. And so on. A week later I took a few shots since everything was already starting to show substantial growth.
The garden in one week

Cucumbers - Straight Eight (I think!) and Pickling along with zucchini and squash in the back

Tomatoes

At this point, my garden is about 6 weeks into growing and so far so good. I picked 4 cucumbers yesterday and we had them with dinner. They were nice and crunchy and oh so fresh tasting! I think I may have to build something for the cucumbers to vine on before they take over the whole plot. Someone at work suggested getting some bamboo and building teepee with garden twine. I may try to do that sometime next week if I have the time.


May 29 Garden View 1

May 29 Garden View 2
May 29 - Crazy Cucumbers!

May 29 - Tomatoes
I know that I've got a lot of learning to go and that I've probably not done several things right (like starting the cucumbers on a trellis to start). There is a lot of season yet to go this year so I'll keep updating! Hopefully we'll be bringing in some great homegrown veggies this year and maybe even can some homemade salsa.

Tuesday, May 29, 2012

First Time Using Wheat

What do I know about wheat? Well, I do know that wheat is considered a staple for any food storage. I also know that it stores easily and has a very long shelf life, whereas flour is a bit more difficult for long term storage and can go rancid. Fresh ground wheat also has more nutrients than processed flour. I also know that it is a bit more difficult to work with than having flour at the ready, but at the same time, I know that it's something I should learn how to use.

I've been researching wheat prices for awhile but our family is on a pretty tight budget. I wasn't sure that I wanted to shell out a big chunk of money for a huge quantity of wheat when I wasn't even sure if I was going to like working with it. Not to mention the cost of purchasing some kind of grinder. Then one day my husband and I were walking down the main street in our little town and one of the shops had 5 lb bags of hard red and hard white wheat for sale. At $5.50 per bag I figured it was a reasonable size and price for trying something new. I'd also read that coffee grinders work alright for wheat so with such a small amount, I could probably get by without shelling out money for a wheat grinder. We picked up a bag of the hard white, brought it home, and it sat on the counter for a couple of weeks before I was brave enough to do something with it.

I had read about whole wheat blender pancakes over at Food Storage Made Easy, then actually discovered a similar recipe in one of my family reunion cookbooks. Since I am on a break from school right now and have some extra time on my hands, I decided to try making these pancakes as a breakfast for dinner. I am pleased to say they were a resounding success! Neither my husband nor I could believe the flavor difference between using regular flour (or even whole wheat) versus the wheat berries. The pancakes were denser, but more filling and much better tasting. Now he's asking that I make them every night! I'm not entirely sure that will happen, but they will likely make it into our weekend breakfast rotation. I think my next adventure in using wheat will be using our coffee grinder to make flour in an attempt at some chocolate chip cookies.

Wheat Kernels
Completed pancakes!
Mixed batter
Whole Wheat Blender Pancakes (from Monica Ripley in the Martin Family Reunion cookbook from 2003)

1 1/2 cup milk
1 cup wheat kernels
1 egg
1 1/2 tsp salt
1/3 cup oil
1 tsp baking power
3 tbsp sugar or honey

Add milk and wheat kernels to blender and blend for 2-3 minutes on high speed. Add the rest of the ingredients and blend for 1 minute more. Pour onto hot skillet, cooking each side until golden brown.

*Note: When I first started blending the wheat and milk, it had a very thin consistency. If I had poured it on the griddle at that point it would have just gone everywhere. I ended up adding about another 1/2 cup of wheat and blending for nearly 5 minutes more until the consistency was such that pancakes would form. I think either using less milk or more wheat would work. I also used skim milk so it's possible that was the reason for the consistency.


Monday, May 28, 2012

An Introduction

First and foremost, I am by no means an expert in anything that has to do with homesteading. However, I am a very good learner and I like to read, a lot. The point of this blog is for me to chronicle my family's journey as we move to a life of homesteading and hopefully, self-sufficiency. I know this won't be an easy road, but it is one that my husband and I have decided we need to travel down. We currently live in suburbia America and realize the need for becoming more self-reliant. Although we are still 2-3 years away from moving to a more permanent homestead location, we know that there is plenty we can do now on our little quarter acre to learn and prepare for the bigger challenges that lie ahead. I welcome you to join me in this adventure as I share the things I learn, both good and bad, and perhaps I'll learn a thing or two from you as well.